How to Use Supabase with Next.js (Complete Guide)
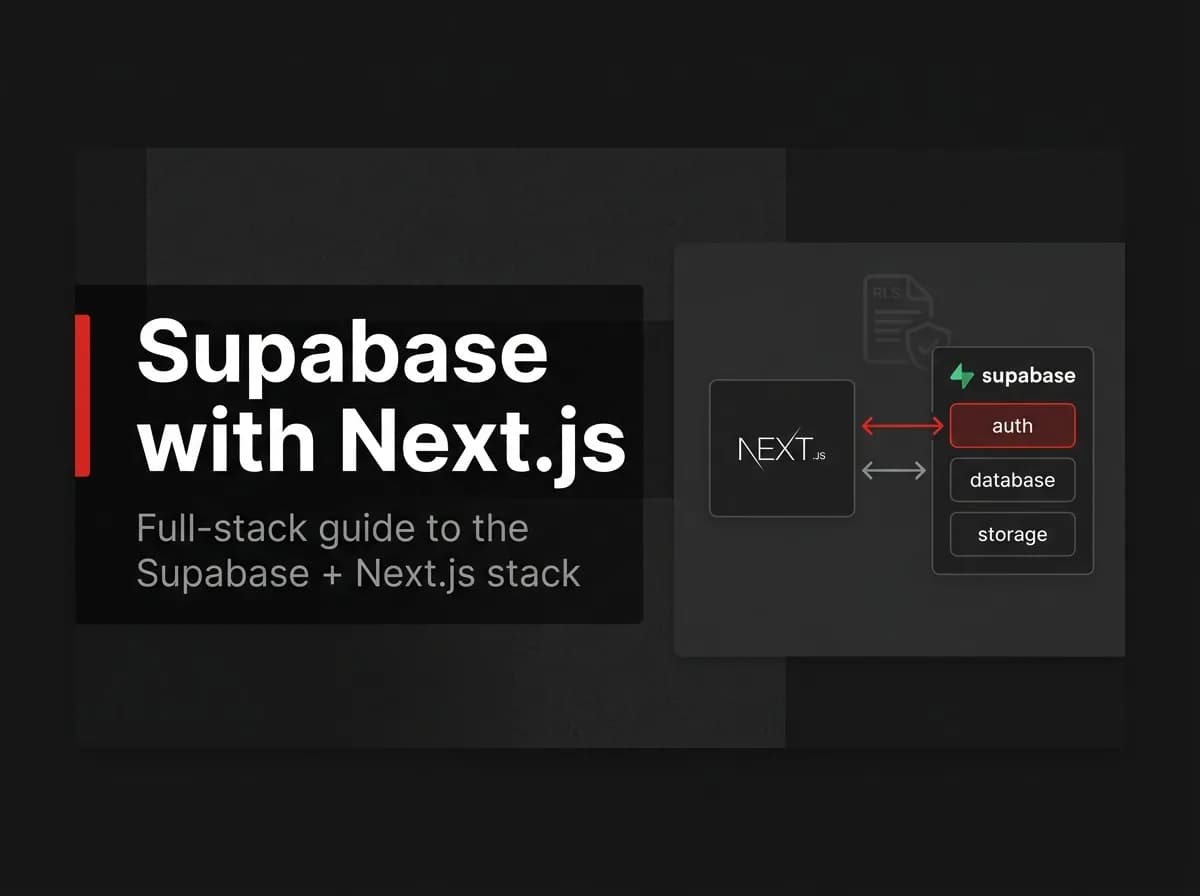
Supabase gives you hosted Postgres, auth, and file storage behind one dashboard. The catch: wiring it into a Next.js App Router project correctly takes more than copying a quickstart. This Next.js Supabase setup guide walks through the production-shaped version: separate browser and server clients, session refresh in Next.js's proxy layer, and your first Row Level Security policy.
By the end you'll have a working auth-protected app skeleton, the client/server boundary set up correctly, and a clear-eyed view of where Supabase fits versus where it doesn't.
Quick answer
Install @supabase/supabase-js and @supabase/ssr, create separate browser and server clients, refresh sessions in your Next.js proxy file, and enable Row Level Security before you ship. Supabase works well with the App Router as long as you respect the client/server boundary: the publishable (anon) key can live in the browser, the service role key never can.
What Supabase gives you (and what it doesn't)
Supabase is an open-source backend platform that bundles hosted PostgreSQL, authentication, file storage, and realtime APIs behind auto-generated SDKs. You get a full Postgres database (not a proprietary abstraction on top of one), a built-in auth system with row-level policies tied to it, S3-compatible storage, and Edge Functions for server-side logic outside your Next.js app.
The honest limits: your data access patterns end up somewhat coupled to Supabase's SDK and its PostgREST layer, and Row Level Security has a real learning curve if you haven't written Postgres policies before. Neither is a dealbreaker. Both are worth knowing before you architect around it.
Step 1: Project setup
Create a project at supabase.com, then grab your project URL and keys from the API settings page. You'll need three environment variables in .env.local:
NEXT_PUBLIC_SUPABASE_URL=your-project-url
NEXT_PUBLIC_SUPABASE_PUBLISHABLE_KEY=your-publishable-key
SUPABASE_SERVICE_ROLE_KEY=your-service-role-key
Supabase renamed the public key from "anon key" to "publishable key" in its current dashboard and docs. If you're following an older tutorial or working in an existing project, you'll likely see NEXT_PUBLIC_SUPABASE_ANON_KEY instead. Same purpose, same safety rules, different label.
Warning: The service role key bypasses Row Level Security entirely. It belongs in server-only environment variables and server-only code (Route Handlers, Server Actions, Edge Functions). Never prefix it with
NEXT_PUBLIC_, never pass it to a Client Component, and never log it.
Step 2: Browser and server clients
The App Router runs code in two places, the browser and the server, and Supabase needs a differently configured client for each. The browser client reads and writes cookies through the DOM. The server client reads and writes cookies through Next.js's cookies() API. The snippets below follow Supabase's current SSR docs; treat them as untested-here and verify against your own project before shipping.
lib/supabase/client.ts:
ts
import { createBrowserClient } from '@supabase/ssr'

export function createClient() {
  return createBrowserClient(
    process.env.NEXT_PUBLIC_SUPABASE_URL!,
    process.env.NEXT_PUBLIC_SUPABASE_PUBLISHABLE_KEY!
  )
}lib/supabase/server.ts:
ts
import { createServerClient } from '@supabase/ssr'
import { cookies } from 'next/headers'

export async function createClient() {
  const cookieStore = await cookies()

  return createServerClient(
    process.env.NEXT_PUBLIC_SUPABASE_URL!,
    process.env.NEXT_PUBLIC_SUPABASE_PUBLISHABLE_KEY!,
    {
      cookies: {
        getAll() {
          return cookieStore.getAll()
        },
        setAll(cookiesToSet) {
          try {
            cookiesToSet.forEach(({ name, value, options }) =>
              cookieStore.set(name, value, options)
            )
          } catch {
            // Called from a Server Component. The proxy layer handles the write instead.
          }
        },
      },
    }
  )
}
Use the browser client for Client Components, mainly realtime subscriptions. Use the server client everywhere else: Server Components, Server Actions, Route Handlers.
Step 3: Session refresh in the proxy layer
Server Components can read cookies but can't write them, so an expired Supabase session needs somewhere else to refresh. That's what middleware used to handle in Next.js. As of Next.js 16, the file convention is renamed: middleware.ts is deprecated in favor of proxy.ts, and the exported function is renamed from middleware to proxy. Logic is unchanged, only the file name and function name move.
Note: If you're on Next.js 16 or later, name this file
proxy.ts, notmiddleware.ts. A leftovermiddleware.tsis silently ignored at build time, meaning your session refresh (and any route protection you put there) stops running with no error.
lib/supabase/proxy.ts:
ts
import { createServerClient } from '@supabase/ssr'
import { NextResponse, type NextRequest } from 'next/server'

export async function updateSession(request: NextRequest) {
  let response = NextResponse.next({ request })

  const supabase = createServerClient(
    process.env.NEXT_PUBLIC_SUPABASE_URL!,
    process.env.NEXT_PUBLIC_SUPABASE_PUBLISHABLE_KEY!,
    {
      cookies: {
        getAll() {
          return request.cookies.getAll()
        },
        setAll(cookiesToSet) {
          cookiesToSet.forEach(({ name, value, options }) => {
            response.cookies.set(name, value, options)
          })
        },
      },
    }
  )

  const { data } = await supabase.auth.getClaims()

  if (!data?.claims && request.nextUrl.pathname.startsWith('/dashboard')) {
    return NextResponse.redirect(new URL('/login', request.url))
  }

  return response
}
proxy.ts (project root):
ts
import { type NextRequest } from 'next/server'
import { updateSession } from '@/lib/supabase/proxy'

export async function proxy(request: NextRequest) {
  return await updateSession(request)
}

export const config = {
  matcher: ['/((?!_next/static|_next/image|favicon.ico|.*\\.(?:svg|png|jpg|jpeg)$).*)'],
}
Note: Supabase's SDK gives you three ways to check who's logged in.
getClaims()verifies the JWT locally against Supabase's public keys and is the one to use for protecting pages and data.getUser()makes a network call to the Auth server for a fully fresh user record.getSession()returns the raw access and refresh tokens; useful for forwarding a token to another service, but don't trust the user object inside it for authorization decisions, since it's read from storage without server revalidation.
Step 4: Auth flow (sign-in and protected routes)
A magic-link sign-in as a Server Action:
ts
'use server'

import { createClient } from '@/lib/supabase/server'
import { redirect } from 'next/navigation'

export async function signInWithMagicLink(email: string) {
  const supabase = await createClient()

  const { error } = await supabase.auth.signInWithOtp({
    email,
    options: { emailRedirectTo: `${process.env.NEXT_PUBLIC_SITE_URL}/auth/confirm` },
  })

  if (error) redirect('/login?error=could-not-authenticate')
  redirect('/login?message=check-email')
}
A protected Server Component reads the same claims your proxy already checked:
ts
import { createClient } from '@/lib/supabase/server'
import { redirect } from 'next/navigation'

export default async function DashboardPage() {
  const supabase = await createClient()
  const { data } = await supabase.auth.getClaims()

  if (!data?.claims) redirect('/login')

  return <p>Welcome back, {data.claims.email}</p>
}
Checkpoint: at this point an unauthenticated visit to /dashboard should redirect to /login, and a signed-in visit should render the claims-derived email. If it doesn't, check that proxy.ts sits at your project root, not inside app/.
Step 5: First table and Row Level Security
Row Level Security (RLS) is Postgres-native access control: policies run inside the database, so they apply no matter which client hits the table. Create a table and lock it down:
sql
create table notes (
  id uuid primary key default gen_random_uuid(),
  user_id uuid references auth.users not null default auth.uid(),
  content text not null,
  created_at timestamptz not null default now()
);

alter table notes enable row level security;

create policy "Users can view their own notes"
  on notes for select
  using (auth.uid() = user_id);

create policy "Users can insert their own notes"
  on notes for insert
  with check (auth.uid() = user_id);
I'd treat RLS policies as app logic that happens to live in SQL rather than as database config you set once and forget. They decide who can read and write what, the same job your route guards do. Write test cases for them (Supabase's CLI supports local test runs against a shadow database), especially before you add a second policy that might overlap the first.
Pro tip: Run
supabase gen types typescript --local > types/database.tsafter any schema change. You get generated types matched to your actual tables and columns, so a renamed column becomes a build error instead of a runtime surprise.
Step 6: Storage and realtime in one pass
File upload through Supabase Storage:
ts
const { data, error } = await supabase.storage
  .from('avatars')
  .upload(`${userId}/profile.png`, file)
A realtime subscription, run from the browser client:
ts
supabase
  .channel('notes-changes')
  .on('postgres_changes', { event: 'INSERT', schema: 'public', table: 'notes' }, (payload) => {
    console.log('New note:', payload.new)
  })
  .subscribe()
Storage covers avatars, uploads, and generated files. Realtime covers live updates, collaborative cursors, and presence. Most apps reach for storage first and add realtime later, which is a fine order to build in.
Supabase SDK vs Prisma for data access
Dimension | Supabase JS SDK | Prisma |
|---|---|---|
Type safety | Generated from your live schema via the Supabase CLI | End-to-end types from |
Migrations | Supabase CLI, SQL-first | Prisma Migrate, schema-first |
RLS interplay | Native. Policies apply automatically to every request | Prisma typically connects with a privileged role that bypasses RLS unless you deliberately scope the connection per request |
Lock-in | Queries run through Supabase's PostgREST layer | Standard Postgres client, portable to any host |
DX | Less boilerplate for CRUD plus realtime in one SDK | Better for complex relational queries and larger schemas |
Verdict: reach for the Supabase SDK when RLS is doing your authorization work and you want realtime in the same client. Add Prisma once your queries get relational enough that raw SQL or PostgREST filters get unwieldy, or when you want an ORM independent of any one backend provider. Plenty of teams run both: Prisma for admin and service-role work, the Supabase client for user-scoped reads and realtime. For more on Prisma alone, see our Prisma with Next.js tutorial.
When Supabase is the right call (and when it isn't)
Supabase is a strong default when you want Postgres, auth, and storage live in a weekend, and when RLS as your primary authorization layer fits your data model. It's a weaker fit once you need a backend that isn't tied to one vendor's dashboard, or when your team already owns a Postgres instance and just wants an ORM and an auth layer on top of it.
Full disclosure: FastStaq takes the second approach. It runs its own PostgreSQL through Prisma, with 76 data models and first-party auth (email/password, Google OAuth, magic links, TOTP 2FA) instead of depending on Supabase. You own the schema and the auth code directly, rather than working through a managed provider's generated layer. If you like Supabase's hosted Postgres specifically but want FastStaq's auth, billing, and workspace patterns on top, that combination works too: FastStaq connects to any Postgres host through a standard DATABASE_URL, including Supabase's.
For a head-to-head on the managed-backend side of this decision, see Supabase vs Firebase.
FAQ
Does Supabase work with the Next.js App Router? Yes. Use @supabase/ssr with separate browser and server client factories, and refresh sessions in your proxy file (proxy.ts in Next.js 16+, middleware.ts in earlier versions). This is the officially supported pattern, not a workaround.
Should I use Supabase Auth or NextAuth (Auth.js)? Supabase Auth is the better default if you're already using Supabase for your database, since auth.uid() plugs directly into your RLS policies with no extra wiring. NextAuth (Auth.js) is backend-agnostic and fits better if your database isn't Supabase, or if you want an auth layer that isn't tied to your data provider.
Can I use Prisma with Supabase? Yes, Supabase is standard Postgres under the hood, so Prisma connects with a normal DATABASE_URL. The catch: Prisma's default connection typically bypasses Row Level Security, so decide upfront whether RLS or your application layer is doing authorization for Prisma-issued queries.
Is Supabase's free tier enough? For prototyping and early validation, generally yes: the free tier includes 50,000 monthly active users, 500 MB of database storage, 1 GB of file storage, and 5 GB of egress. The main constraint is that free projects pause after a week of inactivity, and you're capped at two active projects. Production traffic or a database past 500 MB pushes you to the Pro plan, which starts at $25 per month plus compute.
Can I access Postgres directly? Yes. Supabase gives you a real connection string, so psql, Prisma, or any Postgres client can connect directly. For serverless environments, use Supabase's connection pooler (Supavisor) rather than a direct connection to avoid exhausting your connection limit.
Where to go next
You've now got a Supabase project wired into Next.js with separate browser and server clients, session refresh in the proxy layer, a protected route, and your first RLS policy. From here, the next real step is writing a second policy (update or delete) and testing that it doesn't accidentally widen access from your first one.
If you're setting this up as part of a broader SaaS build, our SaaS boilerplate guide covers the rest of the stack decisions around it, and our Next.js authentication guide goes deeper on auth patterns specifically.
And if you'd rather skip the wiring entirely and own the whole stack instead of assembling it from managed services: FastStaq ships Postgres, Prisma, auth, billing, and 76 data models already wired together, source code included.