How to Add Auth0 Authentication to Next.js
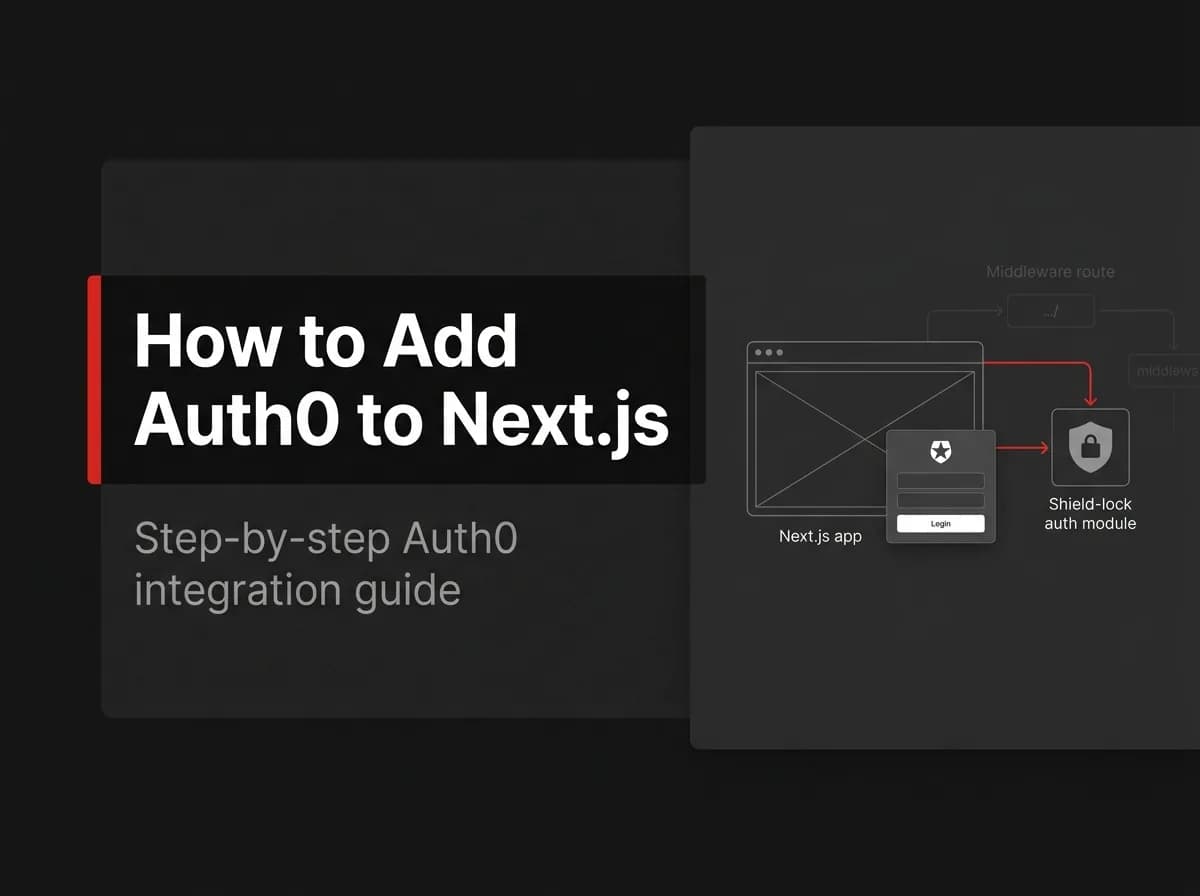
To add Auth0 to a Next.js app, install the @auth0/nextjs-auth0 SDK, set your Auth0 domain and client credentials as environment variables, then wire up a middleware file and a server-side Auth0 client so Auth0 handles login, logout, and session storage for you. That gets you hosted login, social providers, and session management without building any of it yourself. If you'd rather own your auth stack instead of renting one, skip ahead to "When you might not need Auth0."
What Auth0 gives you
Auth0 is a hosted authentication provider you integrate through its SDK instead of building login screens, password hashing, and session handling yourself. You configure an application in the Auth0 dashboard, drop in the SDK, and Auth0 takes over the parts of auth most teams would rather not maintain.
Concretely, that means:
Hosted login pages: Auth0 serves the login, signup, and password-reset screens, so you skip building and securing those forms.
Social and enterprise providers: Google, GitHub, Microsoft, and SAML/SSO connections are configured in the dashboard, not wired up in your code.
Session management: the SDK issues and verifies a session cookie, refreshes tokens, and exposes the current user to both server and client code.
MFA and passwordless options: one-time codes, magic links, and passkeys are available as toggles rather than features you build.
Note: Auth0's free tier and paid pricing tiers change over time. Details verified July 2026; check Auth0's pricing page for current tiers before you commit.
Setting up Auth0 in Next.js
This walkthrough uses the current Auth0 Next.js SDK (v4), which targets the App Router and mounts its routes under /auth/* rather than /api/auth/*. Confirm the installed SDK version against Auth0's own quickstart at publish time; SDKs move fast and this guide is flagged untested-here.
1. Create the Auth0 application. In the Auth0 dashboard, create a Regular Web Application and note the Domain, Client ID, and Client Secret. Set your Allowed Callback URLs to http://localhost:3000/auth/callback and your Allowed Logout URLs to http://localhost:3000 for local development.
2. Install the SDK.
bash
npm install @auth0/nextjs-auth03. Set your environment variables. Create .env.local at the project root:
bash
# .env.local
AUTH0_DOMAIN=your-tenant.auth0.com
AUTH0_CLIENT_ID=your-client-id
AUTH0_CLIENT_SECRET=your-client-secret
AUTH0_SECRET=a-long-random-string
APP_BASE_URL=http://localhost:3000
Generate AUTH0_SECRET with openssl rand -hex 32. It signs the session cookie, so keep it out of version control the same way you'd treat a database password.
4. Create the server client.
ts
// lib/auth0.ts (untested-here, verify against current SDK docs)
import { Auth0Client } from "@auth0/nextjs-auth0/server";

export const auth0 = new Auth0Client();
5. Add the middleware. The SDK intercepts auth routes at the network boundary, so you need a middleware file rather than a manual catch-all route in newer versions.
ts
// middleware.ts (untested-here, verify against current SDK docs)
import type { NextRequest } from "next/server";
import { auth0 } from "@/lib/auth0";

export async function middleware(request: NextRequest) {
  return await auth0.middleware(request);
}

export const config = {
  matcher: ["/((?!_next/static|_next/image|favicon.ico|robots.txt).*)"],
};
With that in place, /auth/login, /auth/logout, and /auth/callback work without extra route files. Set your Auth0 dashboard's callback and logout URLs to match once you deploy to a real domain.
Pro tip: if you're on Next.js 16, the SDK docs currently reference a
proxy.tsconvention alongsidemiddleware.ts. Check the docs for your exact Next.js version before you copy this in; the file name matters more than it should.
Protecting routes
Once the client and middleware are wired up, protecting a page is a single check against the session.
tsx
// app/dashboard/page.tsx (untested-here, verify against current SDK docs)
import { auth0 } from "@/lib/auth0";
import { redirect } from "next/navigation";

export default async function DashboardPage() {
  const session = await auth0.getSession();
  if (!session) {
    redirect("/auth/login");
  }
  return <h1>Welcome, {session.user.name}</h1>;
}
For API routes, the same session check works inside a route handler and returns a 401 instead of redirecting:
ts
// app/api/account/route.ts (untested-here, verify against current SDK docs)
import { auth0 } from "@/lib/auth0";
import { NextResponse } from "next/server";

export async function GET() {
  const session = await auth0.getSession();
  if (!session) {
    return NextResponse.json({ error: "Unauthorized" }, { status: 401 });
  }
  return NextResponse.json({ user: session.user });
}
Both patterns rely on the server-side getSession() call, which reads the signed cookie the middleware set. There's no client-side token to leak into a browser extension or a stray console log.
Sessions and logout
The session cookie is opaque to the browser and re-validated on the server on every getSession() call, so you don't manage expiry or refresh logic yourself. Client components that need the current user read it through the useUser() hook instead of calling the server client directly:
tsx
// components/nav-bar.tsx (untested-here, verify against current SDK docs)
"use client";
import { useUser } from "@auth0/nextjs-auth0/client";

export default function NavBar() {
  const { user, isLoading } = useUser();
  if (isLoading) return null;
  return user ? (
    <a href="/auth/logout">Log out</a>
  ) : (
    <a href="/auth/login">Log in</a>
  );
}
Logout is a plain link to /auth/logout. The SDK clears the session cookie and redirects to whichever Allowed Logout URL you configured in the dashboard.
Remember: rotate
AUTH0_SECRETif it ever leaks. That invalidates every active session, which is the correct tradeoff for a compromised signing key.
When you might not need Auth0
Auth0 is a strong default if you want authentication off your plate entirely and you're fine with a per-active-user pricing model as you grow. It's a weaker fit if you want full control over your session logic, you're already paying for a Postgres database and would rather store users there, or you want to avoid a vendor dependency on your login flow specifically.
When we were deciding how authentication should work in FastStaq, a hosted provider was the easier option on paper. We could wire in an SDK, hand off the login flow, and spend our development time on billing, support, and the rest of the SaaS stack.
The tradeoff appeared when we looked at what FastStaq buyers actually needed. They were buying full source code so they could control their product, change its behavior, and run it without a critical feature depending on another vendor’s dashboard or pricing model. Shipping an auth wrapper around a hosted service would have weakened that ownership.
That tipped the decision. We built authentication into the codebase and stored the data in Postgres through Prisma. The scope grew beyond a login form: email and password sessions, Google OAuth, magic links, TOTP 2FA, trusted devices, API keys, and role-based access control all had to work together.
Owning the auth layer cost us more engineering time upfront, and it means we are responsible for maintaining it. For FastStaq, that cost fits the product promise. For a small app that only needs login and wants authentication handled externally, I would still choose the hosted provider and move on.
Full disclosure: I build FastStaq, a Next.js and Express boilerplate, and we made the second call. FastStaq ships its own auth module in source: email/password sessions, Google OAuth, magic links, TOTP 2FA, trusted devices, API keys, and role-based access control, all wired up on day one. Auth0 isn't bundled with FastStaq and doesn't need to be; the auth code is already in the repo, running on Postgres via Prisma, so there's no per-user auth bill and no separate dashboard to configure.
That's a genuine tradeoff, not a knock on Auth0. Renting auth means someone else patches the OAuth edge cases and keeps up with new attack vectors. Owning it means one less external dependency and one less line item that scales with your user count.
Dimension | Auth0 (rent) | Own auth (e.g., FastStaq) |
|---|---|---|
Setup | SDK + dashboard config | Already in the codebase |
Cost model | Scales with monthly active users | Fixed, no per-user auth fee |
Data location | Auth0's infrastructure | Your own Postgres database |
Social/OAuth providers | Configured in dashboard | Google OAuth included; others need custom code |
MFA | Built-in toggle | TOTP 2FA included |
Vendor dependency | Yes, for login availability | None for auth specifically |
Note: the Auth0 column reflects Auth0's publicly documented feature set at a general level. Details verified July 2026; check Auth0's site for current tiers and this table is refreshed quarterly.
FAQ
How do I add Auth0 to a Next.js app? Install @auth0/nextjs-auth0, set your Auth0 domain and client credentials as environment variables, add a middleware file that mounts Auth0's auth routes, then create a server-side Auth0Client instance to read the session in your pages and API routes.
Do I need Auth0 for a Next.js app? No. Auth0 is one option among several, including other hosted providers and building your own session-based auth on top of your database. Teams that want auth off their plate and are comfortable with usage-based pricing tend to prefer Auth0; teams that want full control over sessions and data tend to build or buy pre-built auth in their codebase.
Is Auth0 free to use with Next.js? Auth0 offers a free tier suited to small or early-stage projects, with paid plans as usage grows. Check Auth0's pricing page directly for current limits and rates, since these change over time.
What's the difference between Auth0 and building your own auth? Auth0 hosts your login pages, session storage, and provider integrations on its infrastructure, billed by usage. Building your own auth (or starting from a boilerplate that already has it, like FastStaq) keeps the code and user data in your own database with no per-user auth fee, at the cost of maintaining it yourself.
Can I use Auth0 with the Next.js App Router? Yes. The current Auth0 Next.js SDK targets the App Router, with middleware-based route mounting and a server-side client for reading sessions in Server Components and route handlers.
Where to go next
Adding Auth0 to Next.js comes down to five pieces: an Auth0 application, environment variables, a middleware file, a server client for checking sessions, and the useUser() hook for client components. From there, protecting a page or an API route is a single session check.
If you're still deciding between renting auth and owning it, read our comparison of Auth0 vs Clerk and our roundup of Auth0 alternatives for a wider view of hosted options. For the full picture of what "own your auth" looks like in practice, see our guide to authentication choices for SaaS apps
Your next action: spin up a test Auth0 application, wire in the four files above on a throwaway branch, and confirm login and logout work end to end before you touch production code.
If you'd rather skip the provider entirely, FastStaq ships auth already wired up (sessions, Google OAuth, magic links, TOTP 2FA, API keys, and RBAC) as part of a $299 one-time, lifetime license with the full source code. Check it out at faststaq.com.